30th Oct 2026
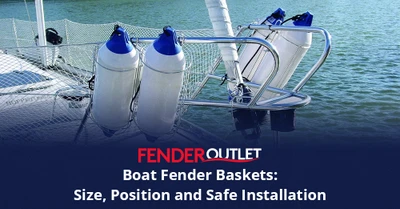
A boat fender basket should match the fender’s correctly inflated diameter, support it without crushing or excessive movement, and be mounted to a rail or structure capable of carrying the basket, fenders and dynamic loads. It must not obstruct navigation lights, helm visibility, side decks, liferafts, anchors, sheets or boarding routes.
The most common mistake is buying by the fender’s printed model name without checking actual diameter. The second is mounting a convenient rack where the crew later discover it blocks a narrow walkway or catches a foresail sheet.
This guide explains how to measure, choose and position products from our fender basket range. Always follow the basket and boat manufacturer’s load and mounting instructions.
A guardrail is not automatically a structural equipment rack. Stanchions, pulpits and rails vary in construction and backing. Obtain professional advice if the proposed basket can be hit by waves, loaded with large fenders or mounted where failure could injure someone or damage the boat.
Contents
- Key facts at a glance
- What are the benefits of a fender basket?
- How do you measure a fender for a basket?
- How many fenders should a basket hold?
- Where should fender baskets be mounted?
- What must a basket never obstruct?
- How are fender baskets installed?
- How should fenders be retained in the basket?
- How should stainless fender baskets be maintained?
- Should fenders stay in baskets while under way?
- Common fender-basket mistakes
- Fender basket buying checklist
- Frequently asked questions
- Technical references
Key facts at a glance
- Measure the fender at its correct working pressure and compare its maximum diameter with the basket’s internal dimensions.
- Allow enough clearance for easy insertion without letting the fender rattle, escape or wedge against a hard edge.
- Check basket height and opening as well as diameter; short or round fenders may need a different holder.
- Mount only to a rail, pulpit or structure approved for the combined static and dynamic load.
- Keep navigation lights, name/number markings, helm sight lines, liferafts and emergency equipment unobstructed.
- Check sheets, furling lines, mooring lines and anchor gear through their complete working paths.
- Use compatible marine fasteners and clamps, and inspect for loosening, crevice corrosion and rail distortion.
- Secure fenders against wind or heavy motion without creating an entanglement or delaying emergency deployment.
- Remove and inspect baskets during winter lay-up or after impact and severe weather.
Compare fender holders by size and capacity
Check the internal diameter, number of fenders, mounting system and overall projection before ordering.
What are the benefits of a fender basket?
Fenders are bulky, roll around lockers and can obstruct decks when not managed. A purpose-designed holder keeps a ready set visible and accessible, frees locker volume and can make arrival preparation faster.
| Benefit | Practical value | Condition for success |
|---|---|---|
| Fast deployment | Crew can lift out a known fender without opening a deep locker | Basket is reachable from a safe position and retaining strap releases easily |
| Locker space saved | Bulky inflated fenders remain on deck | External storage does not obstruct sailing, visibility or access |
| Deck organisation | Lines and fenders have assigned locations | Ropes are coiled or secured without trailing or snagging |
| Ventilation and drainage | Wet fenders can dry better than in a sealed locker | Basket and location drain freely; covers are still cleaned and inspected |
| Consistent inventory | Missing or damaged fender is visible | Basket is sized for the planned set and inspected regularly |
| Reduced loose-gear risk | Fenders do not roll across cockpit or cabin | They are retained against wind, waves and heel |
A basket is not the only option. Large deflatable products from inflatable fenders may pack into a locker, while smaller boats may secure clean fenders temporarily with suitable lines. Choose the system that reduces risk rather than adding deck clutter.
How do you measure a fender for a basket?
- Identify the exact fender model. Use the manufacturer’s stated inflated diameter where available.
- Set the correct pressure. An underinflated measurement may lead to a basket that becomes too tight after inflation.
- Measure the widest point. Use a flexible tape around the circumference or measure diameter with a straight rule and square surfaces.
- Check end-eye width. Some moulded eyes or ribs project beyond the body and must pass through the opening.
- Measure overall length. Confirm the fender will not fall through, protrude dangerously or foul the deck.
- Include the cover if used. A fender sock adds thickness and friction.
- Compare several fenders. Nominally identical older products may differ through pressure or deformation.
- Use the basket maker’s fit range. Do not assume a universal clearance percentage.
Read How Much Air Should You Put in a Boat Fender? if the current diameter is uncertain.
How many fenders should a basket hold?
The answer is limited by both the basket design and mounting structure. Single, double and multiple-holder systems distribute weight and windage differently. A long stack of fenders can exert significant leverage on a pulpit when the boat pitches or a wave strikes them.
| Storage need | Potential arrangement | Points to check |
|---|---|---|
| One large primary fender | Single wide basket | Diameter, end-eye clearance, retaining strap and rail load |
| Two or three matching cylindrical fenders | Multi-cell or linked baskets | Each cell size, total width, clamp count and fender retrieval order |
| Mixed sizes | Separate baskets sized for each type | Avoid a small fender dropping through a large holder |
| Round fenders | Purpose-designed round holder or alternative storage | Shape, escape risk and overall projection |
| Large cruising reserve | Deflatable fender in bag plus everyday basket set | Pump access and rapid preparation before arrival |
| Small RIB/motorboat | Compact single/double holder only if structure allows | Visibility, passenger movement and windage at speed |
Never overload a basket by forcing extra fenders under the frame or through one retaining strap. Compression can deform products and the added leverage can exceed the mounting design.
Where should fender baskets be mounted?
Common locations
Many baskets are mounted to a bow pulpit, stern rail or robust guardrail section. The correct location depends on the boat. A position that works on a cruising yacht may be unsafe on a fast motorboat or a RIB with low rails.
| Location | Possible advantage | Critical checks |
|---|---|---|
| Bow pulpit | Fenders accessible before entering berth; frees cockpit | Navigation lights, anchor, forestay/furling gear, visibility, windage and sail foot |
| Stern rail | Convenient near cockpit and aft berth contact | Outboard/engine movement, bathing platform, ladder, ensign, tender and exhaust |
| Side guardrail | Fenders close to deployment positions | Side-deck width, stanchion strength, sheets, gates and boarding |
| Cabin-side rail or dedicated bracket | May keep baskets inboard | Manufacturer approval, structural backing and handhold access |
| Flybridge/powerboat rail | Keeps cockpit clear | Helm visibility, speed/wind loads and safe retrieval |
| Locker/internal rack | Reduced UV/wave exposure | Ventilation, drainage, fire access and locker opening size |
Stand at every helm position and check sight lines with the baskets full. Then operate sails, anchor, boarding gates, tender and safety equipment. A basket that is harmless in the marina can become dangerous once the boat is under way.
What must a basket never obstruct?
- Navigation lights: preserve the required arcs and visibility; do not place white fenders in front of a light.
- Liferaft and recovery equipment: release paths, ladders, lifebuoys, danbuoys and MOB gear must remain immediately usable.
- Anchoring system: keep anchor, chain, windlass, bow roller and snubber paths clear.
- Standing and running rigging: check genoa sheets, furling drum/line, spinnaker gear, preventers and mooring warps.
- Deck access: preserve safe handholds, gates and sufficient passage around the basket.
- Helm view: include seated and standing views and the sightline to the bow.
- Engine and steering: do not enter an outboard tilt/turn zone or cover ventilation and exhaust.
- Identification and instruments: keep names, registration, radar reflectors, antennas and sensors unobstructed as required.
How are fender baskets installed?
Follow the product’s clamp orientation, rail-diameter range, fastener material and torque instructions. Some holders use adjustable clamps; others require dedicated brackets or deck fastenings. The complete installation must resist vibration, heel and occasional contact without crushing or rotating on the rail.
- Confirm the rail material, diameter, wall thickness, backing and condition with the boat manufacturer or a competent installer.
- Assemble the basket ashore and check every weld, edge and supplied component.
- Protect the deck and rail during trial positioning.
- Set the basket level or at the manufacturer’s intended angle, with opening accessible and drainage clear.
- Fit the exact clamps and isolation material specified; avoid improvised mixed-metal hardware.
- Tighten evenly to the stated torque without ovalising a tube or cracking a coating.
- Secure locking nuts, thread treatment or retainers only as instructed.
- Load the correct fenders and test for rotation, rattling and access.
- Check all nearby equipment through its full movement.
- Reinspect after the first passage and periodically thereafter.
Do not drill or through-bolt a deck, cabin side or pulpit base without understanding its structure and waterproofing. A marine installer may need to provide backing plates, core protection and sealing.
How should fenders be retained in the basket?
The holder must let the crew deploy fenders quickly while stopping them from lifting out in wind, heel or rough water. Use the basket manufacturer’s strap or a purpose-designed retaining method. Avoid complicated knots that cannot be released under load or long loose cords that can foul rigging.
- Retain the fender body or approved eye without cutting into it.
- Keep buckles and hooks from rubbing the fender or rail.
- Make the release reachable without leaning dangerously outboard.
- Secure the fender rope separately so it does not trail or tangle around the basket.
- Do not rely on a fender sock as the retaining component.
- After deployment, secure the empty strap so it cannot flog or snag.
If dedicated lines are needed, compare fender ropes and fender clips, but confirm each product’s intended load and attachment.
How should stainless fender baskets be maintained?
| Area | Inspect for | Maintenance response |
|---|---|---|
| Welds and wire frame | Cracks, distortion, rough edges and broken welds | Remove from service and repair/replace professionally |
| Rail clamps | Loosening, slip, fretting and rail indentation | Retorque to instructions; reassess mounting strength |
| Fasteners | Rust staining, galling, missing locking parts and mixed metals | Clean, replace compatible parts and investigate corrosion source |
| Contact points | Crevice deposits and trapped salt beneath clamps | Remove periodically, rinse, dry and inspect rail surface |
| Retaining strap | UV damage, cuts, failed buckle and loss of elasticity | Replace before use |
| Fender contact | Chafe against wire end, weld or clamp | Correct alignment and smooth/replace defective component |
| Basket alignment | Rotation into light, sail or walkway | Stop use, correct clamp and evaluate dynamic load |
Stainless steel can still show staining and suffer crevice corrosion, particularly where salt and moisture remain trapped. Use cleaning methods compatible with both basket and adjacent rail, and avoid steel-wool contamination.
Should fenders stay in baskets while under way?
They can remain in a properly designed and securely mounted basket if the boat and basket manufacturer permit it, the conditions are suitable and no system is obstructed. High speed, heavy weather or exposed bow positions can create wind and wave loads far beyond calm marina use.
- Secure each fender and its rope before departure.
- Check that spray and waves cannot fill, lift or strike the stored equipment dangerously.
- Reassess bow-mounted holders before offshore or heavy-weather passage.
- Move fenders to protected internal storage where the owner’s manual or conditions require it.
- Never allow loose lines to trail overboard.
- Include basket security in pre-departure and post-passage deck checks.
Common fender-basket mistakes
- Measuring an underinflated fender and buying a holder that is too small.
- Assuming nominal model numbers equal actual diameter.
- Forcing mixed sizes into one cell.
- Clamping to a weak or poorly backed rail.
- Blocking a navigation light or helm sight line.
- Allowing sheets or anchor gear to pass through the frame.
- Mounting where crew must lean outboard to retrieve fenders.
- Leaving fender lines loose around the basket.
- Ignoring total windage and leverage of several large fenders.
- Failing to remove clamps and inspect hidden corrosion.
- Continuing to use a cracked weld or rotating holder.
Match storage to the fender set
Use the fender size guides to confirm your working diameter before selecting a basket cell or complete holder.
Fender basket buying checklist
- Fender brand, model, correct pressure and measured diameter
- Overall fender length and end-eye width
- Number and mix of fenders to store
- Basket internal diameter, height and capacity
- Rail/structure material, diameter and approved load
- Clamp and fastener compatibility
- Full-basket weight, windage and wave exposure
- Navigation-light and helm visibility
- Clear anchor, sail, mooring and safety-equipment paths
- Safe crew access and release position
- Retaining strap or system
- Drainage, cleaning and corrosion-inspection access
Frequently asked questions
How do I know which fender basket size to buy?
Inflate the fender correctly, confirm the manufacturer’s diameter and measure its widest point and end eyes. Match those dimensions to the basket maker’s stated fit range.
Should a fender fit tightly in the basket?
It should be supported without being crushed or difficult to remove. Excess clearance can allow rattling or escape, while a forced fit can damage the fender and basket.
Can I mount a fender basket on a guardrail?
Only if the rail, stanchions, bases and basket clamps are approved for the total load and dynamic forces. Consult the boat manufacturer or marine installer when uncertain.
Can fender baskets block navigation lights?
They must not. Check required light arcs with the baskets full, from all relevant directions and heel angles.
Do I need a retaining strap?
Use the holder manufacturer’s specified retention method. Fenders must not lift out in wind or motion, but release should remain quick and safe.
Can round fenders go in cylindrical baskets?
Only if the holder is designed and sized for that shape. A round fender can wedge, protrude or escape from a basket intended for long cylindrical products.
How many fenders can I mount on a bow pulpit?
The basket design, pulpit strength, visibility, anchor gear and wind/wave exposure determine the limit. Do not use a generic quantity without checking the complete installation.
Why is my stainless fender basket rusting?
Surface contamination, trapped salt, crevice conditions or incompatible fasteners can cause staining or corrosion. Remove, clean and inspect the basket and rail, and replace damaged or unsuitable hardware.
Technical references
Manufacturer specifications, product instructions and local berth conditions always take priority over generic guidance. Check the instructions supplied with the exact fender, buoy, holder or fitting before use.
==================================================================================================== WEEK 13: Bow-to and Stern-to Mooring: The Complete Fender Setup Guide FILE: 13-bow-to-stern-to-mooring-fender-guide.html PUBLISH: 18 November 2026 ====================================================================================================
For stern-to mooring, protect both aft quarters and the transom or bathing-platform area while keeping every fender and line clear of the propeller, rudder, steering and exhaust. For bow-to mooring, concentrate on the bow shoulders and stem, then keep substantial side fenders ready for neighbouring boats and the final berth geometry.
In either arrangement, the boat should be held off the quay by its mooring system rather than resting permanently on the fenders. Side fenders remain essential because end-on berths usually place boats close together and wind, wash or a neighbouring departure can create contact along the topsides.
This guide focuses on fender preparation. Mediterranean mooring with anchors, laid moorings or lazy lines requires competent boat handling, local instructions and a separate line plan. Obtain tuition or assistance if the manoeuvre is unfamiliar.
Keep all lines and fenders away from propellers and thrusters. A lazy line, pick-up line or trailing fender rope can disable propulsion at the worst possible moment. Brief the crew, control loose rope and follow harbour staff instructions throughout the approach.
Contents
- Key facts at a glance
- What is bow-to or stern-to mooring?
- How should fenders be arranged for stern-to mooring?
- How should fenders be arranged for bow-to mooring?
- Why are side fenders essential in an end-on berth?
- How do you protect against a high or rough quay?
- What changes with a bathing platform or outboard?
- How do you keep lazy lines and fender ropes clear?
- Fender preparation before the approach
- What should be checked after the boat is secured?
- How should fenders be prepared for departure?
- Common end-on fendering mistakes
- Mediterranean-mooring fender checklist
- Frequently asked questions
- Technical references
Key facts at a glance
| Factor | Stern-to | Bow-to |
|---|---|---|
| Primary end protection | Aft quarters, transom corners, platform/ladder zone | Bow shoulders, stem and bow fittings |
| Access ashore | Often easier from bathing platform or passerelle | May require climbing or a bow passerelle; depends on boat and quay |
| Propulsion hazard | High: quay, lines and fenders are near propeller/outboard during approach | Stern remains away from quay but lazy/anchor lines still require control |
| Privacy | Cockpit faces quay | Cockpit usually faces away from quay |
| End fender types | Stern/transom fender, large round/chubby at quarters | Bow fender or large round/chubby at shoulders |
| Side fenders | Required along both sides for neighbouring boats | Required along both sides for neighbouring boats |
| Critical geometry | Bathing platform, exhaust, rudder/outboard and overhang | Anchor, bow roller, flare, pulpit and stem projection |
| Best choice | Determined by local practice, boat layout, wind, crew and mooring system | Determined by local practice, boat layout, wind, crew and mooring system |
Protect the vulnerable end of the boat
Compare purpose-shaped bow, stern and transom fenders before relying on a small cylindrical fender across complex geometry.
What is bow-to or stern-to mooring?
The boat lies approximately perpendicular to a quay or pontoon, secured at the shore end and held from the opposite end by an anchor, laid mooring, lazy line, pile or other local system. Boats may be packed closely side by side, which makes fendering a two-part problem: protect the end facing the quay and protect both topsides from neighbours.
- Stern-to: stern lines lead ashore and the bow is held away by anchor or mooring line.
- Bow-to: bow lines lead ashore and the stern is held away.
- Lazy-line berth: a light pickup line leads to a heavier laid line that is taken to the boat’s bow or stern as directed.
- Anchor moor: the vessel lays its own anchor during the approach, subject to local rules and spacing.
- Between neighbours: side fenders and line control prevent contact as the boat enters and settles.
Do not assume every Mediterranean berth works the same way. Harbour staff may direct line order, approach direction, lazy-line handling and distance from the quay. Follow local instructions rather than applying a generic sequence blindly.
How should fenders be arranged for stern-to mooring?
- Rig side fenders on both sides. Place them through the widest midships and aft sections before entering the row.
- Add larger quarter fenders. The aft quarters often approach neighbouring boats or the quay at an angle.
- Protect the transom geometry. Use a suitable stern fender or transom fender where a platform, vertical transom or corner could contact.
- Keep the centre clear where needed. Preserve access for a passerelle, ladder, exhaust, tender, drive or outboard.
- Set fenders for the quay height. A low floating pontoon and high stone quay require different positions.
- Prepare one mobile large fender. A crew member can place it at an emerging high-load point without putting hands or feet between surfaces.
- After securing, adjust the boat off the quay. Fenders are backup protection, not permanent load-bearing spacers.
A large round fender or chubby fender at each aft quarter can provide stand-off where a long cylindrical fender would slide around the curve.
How should fenders be arranged for bow-to mooring?
- Rig substantial side fenders on both sides. The boat still enters between neighbouring hulls.
- Protect the forward shoulders. Place larger fenders where hull flare or the rubbing strake approaches the quay or neighbours.
- Use purpose-shaped bow protection where suitable. A bow fender can cover the stem or bow geometry, but must not obstruct anchor, roller, forestay, navigation light or mooring line.
- Check pulpit and anchor projection. The metalwork may reach the quay before the hull or fender.
- Allow safe boarding. Do not position ropes or fenders where they make the bow step or passerelle unsafe.
- Keep the stern line system clear. Laid or anchor lines behind the boat must remain clear of propulsion and neighbouring vessels.
Bow-to may keep the cockpit more private and propulsion farther from the quay, but bow access can be more difficult. The choice should follow harbour practice, boat design and crew capability—not fender preference alone.
Why are side fenders essential in an end-on berth?
The quay-end fender receives attention, but neighbouring boats are often the more frequent contact risk. The hulls may roll at different rates, spread apart as one crew boards and then close under wind or wash. Fenders should be deployed before the boat enters the gap, not added after topsides begin touching.
| Side position | Risk | Suggested protection |
|---|---|---|
| Forward shoulder | Bow flare or pulpit area meets neighbour | Large cylindrical or round fender at actual contact height |
| Midships widest point | Sustained parallel hull contact | Correctly sized cylindrical fenders with stable attachment |
| Aft quarter | Hull narrows and fenders escape fore/aft | Larger round/chubby fender plus good spring/line control |
| Different freeboards | Fender sits below one rubbing strake or above the other | Larger diameter, horizontal rigging where appropriate or berth reassessment |
| Different boat lengths | One bow/quarter contacts an unprotected area | Targeted mobile fender and extra coverage beyond the overlap |
| Rigging aloft | Masts/spreaders collide during roll | Fore-and-aft offset; deck fenders do not solve mast alignment |
The rafting-up guide contains additional advice for hull-to-hull fender placement and relative movement.
How do you protect against a high or rough quay?
A high quay can meet guardrails, rubbing strakes or cabin sides rather than the normal hull contact zone. A rough stone or concrete face can abrade both conventional and fabric fenders. Observe the full tide and expected boat movement before relying on one horizontal row.
- Use sufficient diameter so hard projections remain clear under compression.
- Consider a long vertical fender or correctly rigged fender board for rough walls, using competent local advice.
- Keep fabric inflatable fenders away from sharp edges unless their instructions specifically allow the application.
- Use clean covers cautiously; grit trapped against the hull can abrade under movement.
- Protect passerelles from slipping or being crushed without using a fender as an improvised structural support.
- Recheck at high and low water if the berth is fixed rather than floating.
- Ask harbour staff about surge, ferry wash and known contact points.
Where the same private berth is used repeatedly and permission is available, suitable dock fendering may protect a fixed quay edge or corner.
What changes with a bathing platform or outboard?
Bathing platforms
A platform can project beyond the transom and take the first load. Position specialist fenders at its outer corners or designated protection points without blocking the passerelle or ladder. Confirm the platform is not being used as the primary structural contact surface.
Outboards and sterndrives
An outboard may turn or tilt into a fender or line, and its lower unit can be vulnerable near a quay. Keep the full steering and tilt arc clear. Follow the engine and boat manufacturer’s berth position and trim guidance.
Twin rudders and transducers
Even when they do not touch the quay, submerged appendages can be caught by lazy lines. Control line position from a safe station and avoid allowing slack beneath the hull.
Never try to free a fouled line by entering the water in a working marina or with propulsion available. Stop the engine, alert harbour staff and use an appropriate safe recovery plan.
How do you keep lazy lines and fender ropes clear?
- Brief one crew member to manage the lazy/pick-up line and another to manage shore lines and fenders.
- Keep coils contained and never stand inside a bight.
- Lead the lazy line outside guardrails and fittings as directed, then walk it forward or aft without dropping slack under the boat.
- Do not throw excess line into the water near a running propeller or thruster.
- Keep fender-rope tails short enough not to trail, while retaining secure knots.
- Use neutral only when appropriate to the manoeuvre and local instruction; do not engage propulsion over an unknown line position.
- After securing, tidy every line so it cannot drift into neighbouring propulsion.
- On departure, confirm all lazy, anchor and shore lines are clear before engaging propulsion.
Use correctly sized fender ropes; they should be adjustable without leaving dangerous trailing tails.
Fender preparation before the approach
- Contact the marina or harbour and confirm whether the berth is stern-to, bow-to, anchor-laid or lazy-line.
- Brief the crew on approach side, shore-line plan, lazy-line handling, fender positions and abort signal.
- Rig side fenders on both sides at the expected neighbour contact height.
- Fit end protection at bow or stern without obstructing propulsion, anchor, access or navigation lights.
- Prepare one large mobile fender with a safe handle/line.
- Secure unused ropes, tender, passerelle and loose deck gear.
- Check wind, crosswind, tide/current and wash; reassess whether the manoeuvre remains suitable.
- Approach at the minimum speed that retains control and be ready to abort before entering a position the crew cannot manage safely.
Carry large protection without filling every locker
Deflatable fenders can provide useful occasional stand-off for high quays and Mediterranean cruising, provided they are prepared before arrival.
What should be checked after the boat is secured?
| Check | What good looks like | Correct if |
|---|---|---|
| Distance from quay | Safe boarding distance without boat resting hard on fenders | Transom/bow touches, passerelle is unsafe or lines snatch |
| Side clearance | Fenders remain between boats through normal roll | Rubbing strakes, stanchions or windows approach contact |
| Quarter protection | Large fenders remain at the curved contact points | They squeeze fore/aft or ride above the neighbour |
| Lazy/anchor line | Correct lead and tension, clear of underwater gear | Slack can reach propeller/rudder or crosses neighbour improperly |
| Shore lines | Secure, protected from chafe and not dangerous to pedestrians | Lines cross access routes, rub sharp edges or take uneven load |
| Fender lines | Secure, adjustable and clear of water/propulsion | Tails trail, knots touch hull or clips distort |
| Access and safety | Passerelle/route stable; emergency equipment clear | Fender or line blocks ladder, liferaft, exit or exhaust |
| Weather/tide plan | Room for expected change and contact monitoring | Wind shift or surge will bypass current protection |
How should fenders be prepared for departure?
Leave side and end fenders deployed until the boat is clear of neighbours and the quay. Removing them early creates an unprotected period while shore and lazy lines are being recovered.
- Brief the crew and confirm the line-release order with harbour staff or neighbours.
- Start and test propulsion only after confirming water and line conditions.
- Remove or secure the passerelle and loose deck gear.
- Control the lazy or anchor line so it sinks or clears as intended without entering propulsion.
- Use shore lines to maintain control while the final line is released.
- Keep the mobile fender ready at the likely contact side.
- Move clear slowly, then recover fenders when there is no further contact risk.
- Rinse and inspect fenders after rough masonry, dirty water or heavy compression.
Common end-on fendering mistakes
- Fendering only the quay end and leaving both sides bare.
- Using small fenders that disappear beneath a high rubbing strake.
- Placing a transom fender where it blocks exhaust, ladder or passerelle.
- Leaving fender ropes or lazy lines near the propeller.
- Removing fenders before departure is complete.
- Allowing a round quarter fender to squeeze out because relative fore-and-aft movement is uncontrolled.
- Assuming the boat should rest continuously against the quay fenders.
- Failing to adjust for tide or neighbour freeboard.
- Rigging a bow fender across anchor or navigation-light equipment.
- Entering an unfamiliar berth without a crew brief or abort plan.
Mediterranean-mooring fender checklist
- Local berth and line instructions confirmed
- Side fenders rigged on both sides
- Large bow or stern quarter fenders
- Purpose-shaped end protection where suitable
- One mobile large fender ready
- Correct fender height for quay and neighbours
- Propeller, thruster, rudder and outboard zones clear
- Anchor, bow roller, ladder, exhaust and passerelle clear
- Fender ropes controlled and unable to trail
- Crew roles and abort signal agreed
- Post-mooring tide/weather recheck
- Fenders retained until departure contact risk has ended
Frequently asked questions
Do I need fenders on both sides for stern-to mooring?
Yes in most end-on marina arrangements because neighbouring boats can contact either side during entry, roll, wind shifts and boarding.
What fender is best for the stern of a yacht?
It depends on transom shape, platform, ladder and quay. Purpose-shaped stern/transom fenders or large round fenders at the quarters often work better than one small cylinder across the centre.
How far should the stern be from the quay?
Far enough to prevent contact and allow safe access with the approved passerelle or boarding method. Follow local instructions and adjust the mooring system rather than resting permanently on fenders.
Is bow-to safer than stern-to?
Neither is universally safer. Boat design, propulsion, crew access, wind, berth system and local practice determine the appropriate method.
Can I use inflatable fabric fenders against a stone quay?
Only if the exact product instructions permit the surface and it is protected from sharp abrasion. Large conventional fenders or a suitable fender-board system may be preferable.
Where should quarter fenders be placed?
At the curved aft or forward section most likely to contact the quay or neighbouring hull, with enough diameter to remain in place through roll and fore-and-aft movement.
When should I lift fenders after leaving?
Only after the boat is completely clear of the quay and neighbouring boats. Keep them deployed through the line-release and initial departure phase.
Can a lazy line foul an outboard?
Yes. Keep it controlled and outside the propulsion zone, and do not engage the engine until its position is known. Follow harbour staff and boat-specific procedures.
Technical references
Manufacturer specifications, product instructions and local berth conditions always take priority over generic guidance. Check the instructions supplied with the exact fender, buoy, holder or fitting before use.